

 SUBMITTED PHOTO
 SUBMITTED PHOTO
 SUBMITTED PHOTO
 SUBMITTED PHOTO
 SUBMITTED PHOTO
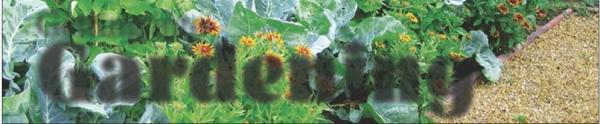
Getting into Gardening
September has arrived autumn is less than three weeks away. Although we may still fell summer’s hot grasp upon us, the weather will soon be turning. The nights and mornings will soon be cooler, afternoons will no longer be in the triple digits and summer garden crops will reach the end of their production. Yes, fall is in the air – even our 100° air!
Fall is when it is important to get a start on your next spring garden. Yep, a little TLC in your garden now will be of great benefit in the spring. Weeds will be easier to control and plant diseases, as well as pests, will no longer drive you crazy. Follow my 10-step program now and you will be thanking me come spring.
1 Clear away rotten fruit - You’ll want to clean up and compost any rotten fruit from the ground around trees – You don’t want to feed pest infestations through the winter.
2 Mulch! - The best time-saving measure a gardener can take is applying mulch. This goes for vegetable gardens or flower beds. Mulched gardens are healthier, have fewer weeds, and are more drought-resistant.
Basically, there are two types of mulch: organic and inorganic. Organic mulches include formerly living material such as chopped leaves, straw, grass clippings, compost, wood chips, shredded bark, sawdust, pine needles, and even paper. Inorganic mulches include gravel, stones, black plastic, and geotextiles such as landscape fabrics. Both types discourage weeds, but organic mulches also improve the soil as they decompose. Inorganic mulches don’t break down and enrich the soil, so I usually opt for organic mulches. This year I am using pecan shell mulch!
There are two fundamental rules for using organic mulches to combat weeds. First, be sure to lay the mulch down on soil that is already weeded, and second, lay down a thick enough layer to discourage new weeds from coming up through it. It can take a 4- to 6-inch layer of mulch to completely discourage weeds, although a 2- to 3-inch layer is usually enough in shady spots where weeds aren’t as troublesome as they are in full sun. If you know that a garden bed is filled with weed seeds or bits of perennial weed roots, you can use a double-mulching technique to prevent a weed explosion. Set plants in place, water them well, then spread newspaper and top it with organic mulch.
3 Sow cover crops - Cover crops just might be the hardest-working plants you’ll ever grow. Cover crops, also called green manure, suppress weeds, build productive soil, and help control pests and diseases. Plus, cover crops are easy to plant and require only basic care to thrive.
You may already know that many farmers use cover crops, but gardeners should too. Just remember that you must kill your cover crops before they set seed and the top growth gets out of control. The best time to kill for this is at flowering or when seed heads first emerge. I use a lawn mower or weed whacker on my cover crops.
4 Confuse Pathogens
– The universal rule for balancing out soil nutrients is to avoid planting the same general category of crop (root, legume, and leafy/fruiting) successively in the same place. It’s best to follow nitrogen-fixing legumes such as peas or beans with nitrogen-loving leaf or fruiting crops such as lettuce or tomatoes. Then, follow the heavy feeding crops with light-feeding root crops. If you have a large home garden, you may want to plan your crop rotation on the basis of plant families rather than on nutrient needs. This can help in avoiding diseases and pests, because crops in the same botanical family tend to suffer from the same pest and disease problems. For example, Texas potato beetles like to eat potato plants, but they also enjoy feasting on tomato leaves. Since these beetles overwinter in the soil, if you plant tomatoes in a spot where you grew potatoes the year before, you could be inviting a beetle problem from the day your spring garden is planted.
5 Start a compost pile - Or add fresh leaves and grass cuttings to your existing pile.
6 Cover up tender ornamentals - Use netting to cover ornamentals such as azaleas and berry bushes.
7 Out with the old - Clear out your old annuals and weeds before they drop seeds, or they could take over your spring garden.
8 Cut perennials back and protect them – You can expect your perennials to come back next year but autumn is the time to cut them back. Otherwise, they may create hiding places for slugs, snails, and other pests. Oh, and if we get a freeze (or another snowfall) this year be sure to Mulch your perennial crops after the ground freezes as this protects them from frost heaving.
9 Simple clean up goes a long way - Clear up and dispose of leaves around roses, apple trees, and plants susceptible to powdery mildew and other pests and diseases that overwinter on debris. Clear out any diseased foliage to prevent problems next year. Do not toss these plants in the compost, bag them up and toss them out. Break off dead branches from roses and fruit trees, but no pruning yet. Finally, clean and care for your tools. With gardening so popular these days, there aren’t many backyards that don’t have at least one patch, pot, or container with something growing in it. But most likely, you’re paying a lot of attention to your plants and not so much to the tools you use to grow them. Trowels, hoes, spades, and shovels take a lot of abuse during the growing season, and if you take time to love them, they’ll work better and last longer.
I recommend that every fall you soak your cleaned tools in a 50/50 solution of water and rubbing alcohol for five minutes, to kill any germs before drying the tools and storing them. You should also do this anytime you have used them to deal with diseased garden materials. A shed is a tool’s best friend because after misuse, the number one enemy of tools is exposure to the elements. Tempting as it may be to leave your tools where you will need them tomorrow, don’t do it! Store your tools in a shed, garage, or even a weatherproof tool storage unit out in the garden (an old, unused mailbox makes a great weatherproof stash for hand tools), and they will last many times longer than tools that spend time out in the sun, rain, and wind or get hidden in the tall grass and then get run over – ouch!
10 Plant your bulbs - Fall is the perfect time for planting many bulbs that bloom in spring. To many gardeners, the autumnal rite of bulb planting has become an almost routine exercise in precise floral grouping. True, the appeal of well-placed bulbs, brightening March and April’s promise around trees and in borders, is a strong one. Yet there’s a different joy in seeing them crop up as if by chance, knowing you sowed such a wonderfully wild array.
Some wonderful and dependable bulbs that I suggest for our area include:
• Daffodils Dutch Master, Unsurpassable, Ice Follies.
• Narcissus Ziva.
• Dutch iris.
• Luecojum or Snowbells.
• Ipheon.
• Tulips – but consider them an annual.
• Grape Hyacinth, which can naturalize.
• Other hyacinths may rebloom for a few years, but the fragrance is worth the shorter life span.
Once you finish my 10-step program you can just sit back and relax. Your garden is ready for winter and is well on its way to rewarding you with enjoyable bounty in the spring. You’re welcome!